Saturday, September 30, 2017

The Woes of the Washi Dress

I purchased the Washi Dress by Made by Rae probably two years ago.  I procrastinated because I thought it might be above my skill level.  I had some confidence making the Isla Top recently so I decided to jump in.  Didn't take long for my confidence to disappear.  This is a great pattern; however, I had difficulties from beginning to end.

I had trouble cutting the pieces and marking all the sewing guides.  Do you mark on the right side of the fabric?  Or the wrong side?  I think I marked everything correctly.

As I began to sew, I realized that perhaps I didn't make the best choice of fabric.  Oh well, too late to turn back now.  The darts seemed easy enough to sew; however, they don't lie flat.  Quite unfortunate since they are right at the bust.


I had trouble with the shirring at the back.  I've used elastic thread in the Isla Top, but I suspect it didn't like this fabric, even though I increased my stitch length.  But I got the pleats right!

I marked the lines for the keyhole neck, but decided not to in the end.  But sadly, the disappearing blue pen I used didn't disappear.  And then I got lipstick on the neck line when I tried it on.  Sigh....and then realized the dress was too snug in the bust.  So at this point, it was hard to continue knowing that I'll never wear this dress.


I choose to top stitch the front and back facings.  Too obvious with this fabric.  When I got to the armholes, I didn't have it in me to make bias binding, so I skipped that and just folded over the edge.  None of the seams are finished inside, so what's one more.  LOL

Here's me holding my breath, hoping I don't pop any seams.  I'd like to make this dress again with a different fabric.  But I need to wait a long time so I can forgot all about today's troubles.


This is one of my Finish Along 2017 Q3 goals.


If you have a finish this week, consider linking up with:

Thank Goodness It's Finish Friday @ Kathy's Kwilts and More
Finish It Up Friday @ Crazy Mom Quilts
Can I Get a Whoop Whoop? @ Confessions of a Fabric Addict
Finished or Not Friday @ Busy Hand Quilts 


Friday, September 29, 2017

TGIFF - Zip Up Tray Pouch

A small finish that has taken me weeks to finish.  And what I thought were a few quick steps today, turned into hand sewing the binding.  😒  Guess I should read the entire pattern before starting.

Here is my version of the Zip Up Tray Pouch by Comfort Stitching.

I had to use a 9-inch zipper as you can't buy 10-inch zippers here.  It's too costly with shipping and possible duty charges to order from the United States.  The shorter length works, but it's not perfect.  Kona Prussian for the binding.


I'm not sure what it's final purpose will be, but right now, it's filled with some EPP that has been sitting on my coffee table for weeks.  The messy pile looks so much better now.


I'm calling this a bag and linking up with Bag It 2017 hosted by Elm Street Quilts.


If you have a finish this week, consider linking up with:

Thank Goodness It's Finish Friday @ Kathy's Kwilts and More
Finish It Up Friday @ Crazy Mom Quilts
Can I Get a Whoop Whoop? @ Confessions of a Fabric Addict
Finished or Not Friday @ Busy Hand Quilts 
Needle and Thread Thursday @ My Quilt Infatuation 


Thursday, September 28, 2017

Review of Paperless Post Invitations

In partnership with Anagram Interactive, I was given an opportunity to do a review for Paperless Post.  I was given free coins to play around the site and to provide a review.  Please note that this is my honest review based on my experience.

There are many, many invitations that you can send for free through Paperless Post.  Some of the free invitations do have options that have a fee (such as an envelope).  And there are also some invitations that have a fee to send.

Let me start by saying that I did not bother to read the Getting Started Step-By-Step tutorial -- I just wanted to jump right in and get started.  How hard could it be? 😉  I created a draft but then I couldn't find it.  But if I had just taken the time to read or think (clearly patience is not one of my virtues), I would have found it in my Dashboard.  Even drafts that you delete stay in your Trash folder until you permanently delete them.  Very helpful.


Once you chose one of the many, many options, you can customize the text, the font -- the possibilities are endless.

Here's the invite for our staff Halloween breakfast.


I wanted to play with all the features, so I included an envelope, which cost 2 coins per envelope.  I did not include a customized stamp.

You can type in the e-mail addresses for invitees, or you can upload, or copy and paste.  I went out on faith:  I created an e-mail and included all the invitees from our Address Book in the To line.  I copied from the To line and pasted into the guest list.  Lo and behold, it worked!!  I will note though, that if your Address Book lists people as lastname, firstname, their invitation will be addressed accordingly.  I did discover after the fact that I could have changed that in my guest list.  I'll remember that next time.  I also forgot to include a few people.  It was easy to update my guest list and send out the additional invitations.

Before you send your invitation, you can preview it.  And make changes.  And preview.  And make more changes.  And there is an option to send yourself a test invitation.  I believe you can only do this once, but it's helpful to see what your guests are actually receiving.  As I was customizing my invitation, I kept wondering, how would it look.  The preview is helpful, but I wanted to see it in real time.

If you choose an envelope, the front of the envelope appears in the body of the e-mail the invitee receives.  There is a box that says:  View the Card.   You then see the back of the envelope, with the invitation poking out.  And then the invitation pops out of the envelope and displays on the screen.  Guests can choose to accept or decline.  They can also see the guest list.


As the sender, I received an e-mail confirming that the invitation had been sent out.  One thing I did like was that I did not get an e-mail with each reply.  Instead, you log in to your Dashboard to view the invitation to see all the responses.

I have to say I am very excited about Paperless Post, and I can't wait to design the invitation to my 50th birthday party.  But maybe I'll wait until the new year -- 10 months out is probably a bit too early to sent invitations.  😃

I encourage you to head over to Paperless Post to take a look.  There are also greeting cards, thank you cards, and stationery.  Have fun.


Friday, September 22, 2017

TGIFF - Finally Finished

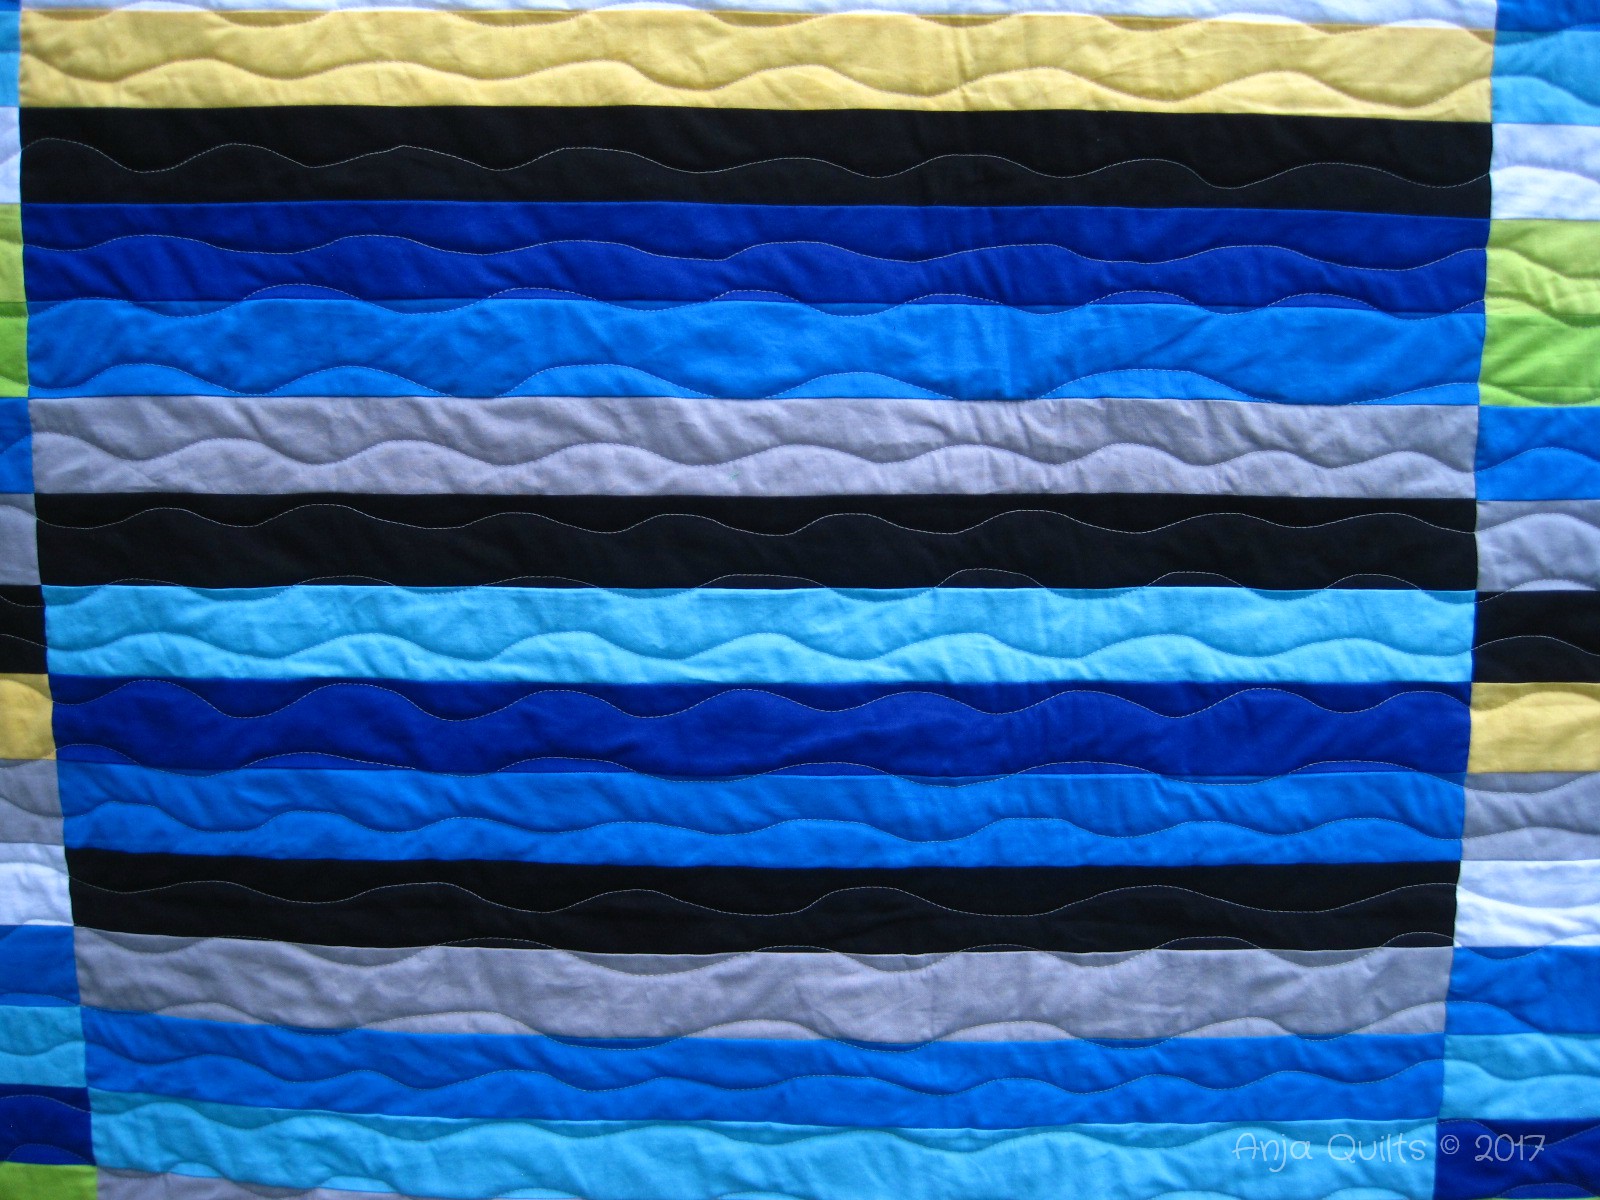
This quilt has been in progress since March.  Thankfully, the customer didn't need it finished quickly.  It feels good to have a finish.

This is my third finish for Finish Along 2017 Q3.  I posted my Q3 goals here.  I only have one more week to finish the last project.  I have high hopes of finishing in time, but I'm not holding my breath.  ðŸ˜Š

I haven't been blogging much (or staying on top of blog reading) because of a busy work schedule.  But I have been quietly and slowly sewing in the background.


The first two times I made this quilt, I quilted straight lines on either side of all seams.  No time for that much work, so organic wavy lines in grey thread.


I used the following Kona colours: Cactus, Carrot, White, Daffodil, Chartreuse, Iron, Malibu, Jamaica, Deep Blue, and Black.  I Kona.


If you have a finish this week, consider linking up with:

Thank Goodness It's Finish Friday @ Slice of Pi Quilts
Finish It Up Friday @ Crazy Mom Quilts
Can I Get a Whoop Whoop? @ Confessions of a Fabric Addict
Finished or Not Friday @ Busy Hand Quilts 
Needle and Thread Thursday @ My Quilt Infatuation 

Friday, September 1, 2017

Friday Finish - One Quilt Becomes Two

I'll be teaching two classes this fall at my LQS.  The plus quilt is a repeat class, so I already had a sample.  But I didn't have a sample of the jelly roll race quilt.  I wanted to make the sample with strips I had in my stash, but I only had 27 strips of blue, and I didn't want to cut into any yardage.  In my mind, the math worked.  Note to self:  write math down -- don't do it in your head.   LOL  As I was about to do the last seam, I realized that I was going to up end up with a quilt approximately 34 x 72 inches.  Well, that's not going to work.  So I cut it in half, and voila, two baby quilts, 33 x 35 inches each.  It's not a perfect class sample, but I think it gives people an idea of the technique.


Organic wavy lines in grey thread.  Grey because it was threaded in the machine, with a full bobbin.  ðŸ˜Š


A colourful backing, with an orange striped binding.


I follow this tutorial by Quilts + Colour.  I use 2.5-inch accent squares rather than a 2.5 x 4.5 inch rectangle.


The above photos were taken late this afternoon.  I finished quilting the other one tonight, but by 8:00 p.m., it was too dark for photos.  Basement photos are blah.  I'll have to take better photos tomorrow.

**Photos have been updated.


An all-over stipple with orange thread.  This one has orange minky fabric on the back.


I am not ready for summer to be over...lights are needed in the house by 7:30 p.m., and the temperature drops quite considerably in the evening.


If you have a finish this week, consider linking up with:

Thank Goodness It's Finish Friday @ Busy Hands Quilts
Finish It Up Friday @ Crazy Mom Quilts
Can I Get a Whoop Whoop? @ Confessions of a Fabric Addict
Finished or Not Friday @ Busy Hand Quilts 
Needle and Thread Thursday @ My Quilt Infatuation 


** Monday is All-You-Can Watch Day on Craftsy.  You can enjoy 1,200+ Craftsy classes for free all day Monday.  If you're not registered with Craftsy, do it now so you can enjoy classes on Monday.


Wednesday, August 30, 2017

OMG August Finished

Where does the time go?  In a blink of an eye, it's the end of August.  But I managed to get some sewing done and finished both of my August projects for OMG (which are also two of my Finish along Q3 goals).


Here is my finished Postcard from Sweden.  You can get the free pattern by Jeli Quilts here.


Organic wavy lines in white thread for a quick finish.


There was enough of the colourful striped backing to use for the binding.


I used the following 36 Kona colours:  Lipstick, Flame, Bright Pink, Pomegranate, Emerald, Kiwi, Sprout, Citrus, Lemon, Creamsicle, Nectarine, Kumquat, Chartreuse, Leprechaun, Cypress, Baby Blue, Regatta, Peacock, Cyan, Riveria, Capri, Lilac, Red, Purple, Mulberry, Crocus, Poppy, Wisteria, Valentine, Carnation, Petal, Candy Pink, Lagoon, Carrot, Orange, and Peapod.


And I finished my blue Isla top (by Made by Rae).  I used my new serger for most of the seams, but I still have a lot to learn.


I'm linking up my finish with:

Let's Bee Social @ Sew Fresh Quilts
WIP Wednesday @ The Needle and Thread Network
Midweek Makers @ Quilt Fabrication
Wednesday Wait Loss @ The Inquiring Quilter
Needle and Thread Thursday @ My Quilt Infatuation 


Saturday, August 26, 2017

Pattern Testing - Squared Off

Cindy @ Stitchin at Home has released a new pattern, and I tested it for her.  You can see Cindy's version here.  The pattern is available for sale here at Craftsy.

My version is the baby size.  I used Kona Lagoon, Chartreuse, Highlight, and White.


The colours don't appear as rich as they truly are...daylight is quickly disappearing earlier and earlier each day.


Simple straight line quilting.  I decided to take the quilting into the border because I didn't want to tie off and cut any threads.  But I love the pattern the lines created in the border.


Giveaway - Leave a comment for a chance to win a copy of Cindy's new pattern.  Head over to Cindy's blog for a second chance to win.  The giveaway is open until midnight Thursday, August 31.


Linking up with:

Can I Get a Whoop Whoop? @ Confessions of a Fabric Addict
Finished or Not Friday @ Busy Hand Quilts 
Show Off Saturday @ Sew Can She 


Thursday, August 24, 2017

TGIFF - Cleo Skirt Finish

Welcome to Thank Goodness It's Finished Friday, once again being hosted here on the East Coast of Canada.


Rae @ Made by Rae hosted a Cleo Skirt QAL earlier this month.  Unfortunately, I got sidetracked with life and didn't finish during the QAL.  Here is the fabric I started with.


I made a little mistake along the way -- accidentally sewed the waistband right side to the wrong side of the skirt.  Oops.


This is a simple pattern with lots of good directions.  There is elastic in the back of the waistband, but not the front.  It has two side pockets.


And voila...a finished skirt.


Here are a couple of photos of me wearing the skirt.


Now it's time for you to link up your finishes.  Link up your blog post showing off your finished project using the linkup below.  Don't forget to visit a few blogs to spread some quilty love and encouragement.  Please include a link and/or the TGIFF button in your blog post so your followers can also view all the great finishes.


Also consider linking up your finish with:

Can I Get a Whoop Whoop? @ Confessions of a Fabric Addict
Finished or Not Friday @ Busy Hand Quilts 
Needle and Thread Thursday @ My Quilt Infatuation 

Wednesday, August 23, 2017

What's Up Wednesday

My apologies...I neglected to announce the winner of my giveaway back in July.  But there's a story (keep reading).  The winner was comment #17 by Izzy.  The patterns have been mailed to Izzy.

My first thought was to name my new Singer Featherweight after one of my grandmothers -- either Ida or Mary.  I was leaning toward Ida (my dad's mother), but I don't recall her sewing.  In the middle of July, while attending a family funeral in my dad's hometown, I made a shocking discovery.  Here's the gist of the conversation with my mother at my grandmother's old house:

Mom:  Do you want Granny's old sewing machine?
Me: Yes!!  (said quickly and loudly)
Mom:  You'll have to ask Tyson (my brother) for it.
Me:  Why?  (as I'm wondering how it is I'm just learning about said sewing machine)
Mom:  It belongs to Tyson.
Me:  Ummm....what??  How????  What????
Mom:  It was willed to him.

At this point, I'm beyond speechless.  My grandmother passed away 37 years ago, when my brother was only a few months old.  I'm the oldest.  I'm a girl.  Why didn't I get the sewing machine?  And why has it been sitting around under cover for 37 years????

A few days later, I ask my brother if I can have it.  He's given it to me on the condition that if he ever wants it back, I have to return it, but that he doesn't think he'll want it.  Fair enough.  So before I can tell my mother that I have approval, I get a call from her saying she and dad are en route home (the sewing machine is three hours away), and they are bringing me the sewing machine.  Ummm...it's been in hiding for 37 years, but now, all of a sudden, it's urgent to deal with it.  Of course, I wasn't home, so the machine was left in my shed.  It is a Singer treadle.  Yeah!!  But now it sits in the shed waiting for some help bringing it into the house.

So the dilemma is, do I call the Singer treadle Ida after my grandmother?  But dad says he doesn't recall her ever sewing or how the machine came to be in the house.  And what do I call the Singer Featherweight?  I think I shall ponder some more.


Exciting news -- Robert Kaufman has 37 new Kona colours!!  ♥ ♥ 

But the sad part (not really) is that I have been collecting all the 303 colours, with the goal to use all 303 colours in projects.  I finally picked up the final colours back in June.  I was working on a plan to start using them all....and then this news.  I'm excited for new colours, but now I have to continue collecting.

I hope to get my Kona page updated soon with all the colours I have used to date.  I need to organize my colours into ones that I have already used and ones that I haven't.

Not a lot of sewing going one.  My busy spring at work has transitioned into a busy summer.  But I've made a list of WIPs (and wish list projects), and I'm going to make an effort to make my way through the list in the coming months.


Wednesday, August 9, 2017

WIP Wednesday - Make All The Things

Cheryl at Meadow Mist Designs is hosting another mystery QAL -- Magnolia Mystery Quilt.  There's still time to join in if you're interested -- July was fabric selection, and August is cutting.  I found all the fabrics in my stash:


The cutting instructions are easy, so I managed to get it all done early in the month.  Now to wait for September's instructions -- let the sewing begin!


There is no shortage of WIP's in my sewing room, but yet I keep starting new projects.  Next up is a skirt QAL with Rae @ Made By Rae.  The Cleo skirt QAL started today and will continue for the next five days.  I found this pink crinkly fabric in my stash.


I had a coupon for my LQS, so picked up some of this African cotton print.  I think I'll use this fabric for my first attempt and then try the pink fabric.


Linking up with:

Let's Bee Social @ Sew Fresh Quilts
WIP Wednesday @ The Needle and Thread Network
Midweek Makers @ Quilt Fabrication
Wednesday Wait Loss @ The Inquiring Quilter


Monday, August 7, 2017

August OMG - Isla Top

I have two goals for August's One Monthly Goal -- make my second Isla Top (one of my FAL Q3 goals) using my new serger and to finish July's OMG goal -- the quilt top is pieced, but it needs to be quilted.

I started with an easy part of the top, as I'm learning how to use my serger at the same time.  I definitey need to take a class at my LQS this fall.


Stay tuned.


Saturday, August 5, 2017

Show Off Saturday - Fidget Quilt

I've been intrigued by fidget quilts for some time, but never found the time to make one.  A friend's mother is in need of a fidget quilt, so it gave me the motivation to start one.  Fidget quilts are for little children, or people who have Alzheimers or dementia -- it gives the fingers and hands something to do.

There are lots of great ideas on the internet, but I mainly followed this tutorial/video by Rob @ Man Sewing.  I didn't have a plan when I started, so I had to search my various crafts piles to find items.


I tried to use items that had different textures:

  • piece of elastic for texture and to pull
  • piece of minky fabric for texture
  • beads on ribbon to slide
  • various pieces of ribbon
  • fuzzy hair elastic to pull


Some more ribbon for playing and some larger beads.


I also added a pocket; a piece of velcro; a zipper; and some lace.


It finishes 23 inches.  I'm hoping this is a good size for her lap and that I've included enough different items and textures.


This took about three hours to finish (finding items took the longest).  I'm looking forward to making more fidget quilts.


If you have a finish this week, consider linking up with:

Thank Goodness It's Finish Friday @ Kathy's Kwilts and More
Finished or Not Friday @ Busy Hand Quilts 
Can I Get a Whoop Whoop? @ Confessions of a Fabric Addict
Show Off Saturday @ She Can Sew


Monday, July 24, 2017

12 Days of Christmas in July Blog Hop

Christmas came early this year.  Sarah @ Confessions of a Fabric Addict is hosting the 12-days of Christmas Blog Hop.  Now's your chance to think about and start working on gifts for Christmas.  Make sure you head over to read all about the blog hop and the awesome giveaway.

Rather than create a new project, I chose to use an existing tutorial -- Festive Forest -- by Sarah @ Berry Barn Designs.  It's a tutorial that I've been wanting to try for some months.  You can get the Festive Forest pattern here.  My thanks to Sarah for allowing me to showcase her tutorial.

You need to cut out seven trees using the template provided in Sarah's pattern.  I went traditional and cut out green trees.  You can use whatever colours you want -- I think an autumn version would be awesome.


Next applique your trees using your preferred method.


I took the easy route and machine stitched my trees to the background.


A quick all-over stipple in white thread for a quick finish.  I debated on what colour to use for the binding -- so glad I went with green.


Ta da -- a quick and easy Christmas wall hanging for yourself or to give as a gift.  I forgot to time myself, but I think this is a project that can be easily done in a couple of hours or less.

This finishes around 13.5 inches x 23 inches.  But you can make it whatever size you wish.  It's a great tutorial and pattern that allows for creativity.

Don't forget to head over to Berry Barn Designs to get the pattern -- Festive Forest pattern

And stop by the other bloggers on this wonderful blog hop.  You're sure to find inspiration.


Friday, July 14th


Saturday, July 15th


Sunday, July 16th


Monday, July 17th


Tuesday, July 18th


Wednesday, July 19th


Thursday, July 20th


Friday, July 21st


Saturday, July 22nd